Thursday, October 24, 2013

Halloween pumpkin project---- paper craft


Materials: orange paper stock
                black paper stock
                glue
Preparation: 1. Cut out the pumpkin shape.
                   2. Cut out the eye, nose and mouth shapes.
                   3. Prepare 3 boxes.  Put eyes in one box, noses in one box, and mouths in one box.


In Class:
1. Discuss with the students about Halloween, such as dressing up in costumes, trick-or-treating, pumpkin carving, etc. Then show the paper pumpkin and tell the children that they are going to put a face to it.
2.  Each student picks his/her favorite eyes, nose and mouth  and paste on the pumpkin.

Options For 4-5 years old children:
1. Let the children to cut out the pumpkin shapes, eyes, nose and mouth themselves.
2. Paper pumpkin can be replaced with origami pumpkin.
     (Use orange paper and follow the origami apple instruction.)


Saturday, June 8, 2013

I Love Dad card

Materials:
  •  Card stock(8.5" x 11.00"): one sheet makes 2 cards
  • Crayon: for decorating the card
  • Die cut letters in brown, blue, green, etc: prepare  a set of I, D, A, D letters per student(letter size: 1.5inch tall)
  • Die cut heart in red (or other colors): prepare one heart per student
  • Glue
In-Class:
  1.  Write down "I", draw a heart, then write DAD on the board and read with the students.
  2.  Tell the students that they are going to make a Father's Day Card.
  3.  Pass the blank cards to the students. Tell them to decorate the cover of the card with crayon.
  4. Pass the letter set & heart to the students to glue them on the card.

Monday, May 27, 2013

Caterpillar Project

Materials:
  • construction paper in different colors(such as green, blue, yellow, orange, pink, beige, purple etc.): this will be the body for the caterpillar.
  • pipe cleaner: this will be the antenna; I used red pipe cleaner, but could be in other colors
  • white glue
  • markers or crayons for drawing the face
Preparation
      1. Cut out the construction paper into circles(about 3 inches in diameter)
      2. Making the face of the caterpillar.
          (a) Cut the pipe cleaner into 3 inches long. 
          (b) Make two holes on a circle, and put the pipe cleaner through the holes.
          (c) Curl the tip of each end of the pipe cleaner so children will not get hurt.

      In-class:
  1.  Tell the children that they are going to make a caterpillar.
  2. Pass the face piece to each children and tell the children to draw a face with markers or crayons.
  3. Children will connect other circles with glue to make the body of the catepillar.
  Option:
Use cereal box instead of construction paper, and ask the children to cut out the circles themselves, and color the circles with paints.(suitable for children older than 4 years old.)

Tree Collage


       Materials:
  • printing paper for collage base(or use light colored construction paper, or light colored, not too busy wrapping paper)
  • brown paper for tree trunk
  • paper in different shades of green for leaves( or use patterned paper as on the photo below)
  • white glue
Preparation:
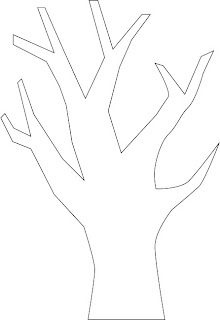
1.  Cut out the tree trunk shapes(see template)
2. Cut out the leaves(about 12 leaves per student): about 2 inches long, 1 inch wide.


Instruction:
1. Discuss about the appearance of a tree.
1. Pass the tree truck to the children, and tell them to glue the tree trunk on the white paper.
2. The children will be gluing the leaves to complete the tree collage project.

For children older than 4 years old, they could cut out the leaves themselves.
Add fruits(apple, lemon, orange, etc) or flowers on the tree.


My Fish Tank


Materials:
  • white printing paper-for the fish tank (one sheet makes 2)
  • construction paper in different colors: 
              brown, beige, black for the aquarium rocks
              green for the aquarium plants
              orange, blue, yellow, purple(or color of your choice) for the fish
  • glue
Preparation:
  1. Cut out the fish tank shapes.Fold printing paper in half, then fold in half again.Trace the fish tank shape and cut it out.This way you can make 2 fish tank shapes
  2. Prepare 3 boxes, one for the fish, one for the aquarium plants, and one for the rocks. Cut out the rocks, plants and fish shapes and put them into the boxes by items.  For aquarium plants, fold the green paper in half, trace the shape and cut it out. Template shapes are just for reference only. If you are comfortable cutting out the shapes without template, you may also cut them out freehand.
In-Class:
  1. Tell the children they are going to do a fish tank project. Discuss with the children what are in the fish tank. Encourage them to think about other things in the fish tank beside fish.
  2. Pass the fish tank to each child. Children will go to the 3 boxes and find the items they want in their fish tanks.
  3.  


Wednesday, April 17, 2013

Giraffe Spot Project

In this project, children will be tearing the brown paper to create the giraffe spots themselves. Easy and open-ended project.


Materials:
  • Yellow paper(8.5" x 11") - for giraffe body
  • Brown paper - for the giraffe body pattern
  • Glue
  • A giraffe photo

Preparation:
  • Use the template and cut out the giraffe body. You may cut out 2 giraffe bodies per one sheet of paper.
  • Prepare about 5" x 8.5" brown paper per student.
In-Class:
  1. Show a giraffe photo to the children and discuss about the distinctive features such as body shape, colors, spots, etc.
  2.  Show the children to tear the brown paper into small pieces, and glue on the giraffe body.
  3. Pass the giraffe body and brown paper to children.  


Sunday, April 7, 2013

Snail--Paper Craft Project

 A fun and easy paper craft project.


Materials:
  • lightweight paper in several different colors for snail
  • green paper for leaves(could be lightweight or heavyweight paper)
  • pencils
  • white glue
Preparation:
1. Use the template A to cut out the snail bodies.
2. Use the template B to cut out the leaves
3. Prepare a photo of a snail.


In-class:
1. Show a photo of the snail and talk about how snails look like.
2. Tell the children that they are going to make a snail with paper
3. Demonstrate how to roll the snail body strip with a pencil.
    Tips: Roll the paper from the side marked with a star.
4. Pass the snail body strip and pencil to children.
    Could be hard for children 2 to 3 years old, so assist children to roll the paper if necessary.
5. When snail body is rolled, glue it on a leaf to complete the project.

Other ideas:
* Use patterned paper for snail body or leaf for fun visual effect.
* Tell children to draw the details to the leaf with marker, crayons, etc before gluing the snail.